• Skip to primary navigation
  • Skip to main content
  • Skip to primary sidebar

Nexus Technology, Inc.

Enabling Innovation for 30 Years

MENUMENU
  • Products & Services
        • Memory Analyzers
          • Overview
          • MA5100 Series
          • MA4100 Series
        • Memory Interposers
          • LPDDR5 Mobile Memory
          • LPDDR4 Mobile Memory
          • LPDDR3 Mobile Memory
          • LPDDR2 Mobile Memory
          • DDR5 Main Memory
          • DDR4 Main Memory
          • DDR3 Main Memory
          • DDR2 Main Memory
          • Flash Memory
        • Probes
          • Analyzer Probes
          • Serial
          • Probing Adaptors
        • Serial Analyzers
          • RapidIO Serial Analyzer
        • Services
          • Attachment Service
          • Custom Interposers
          • Custom Software Support
        • Legacy Products
          • Parallel Bus
          • DDR1 Main Memory
          • GDDR5 Graphic Memory
          • LPDDR1 Mobile Memory
        • All Products
  • Technologies
    • XH Series Interposer Technology
    • EdgeProbe™ Interposer Technology
    • Target Socketed Interposer Technology
    • Direct Attach Interposer Technology
    • Electrical Analysis
    • Protocol / Compliance Analysis
  • News
    • All News
    • Videos
    • Press Releases
  • Support
    • Frequently Asked Questions
    • Leave a Message / Create Support Ticket
    • Live Chat
  • About Nexus
    • Contact Nexus
    • Conflict Minerals Statement
    • WEEE and RoHS Compliance
    • About Nexus

Internal

COVID-19 Update

March 24, 2020 By Nexus Technology, Inc.

Updated: 4/6/2020

We are reaching out to assure you that our management team is monitoring the COVID-19 situation closely and is working to ensure the health and safety of our employees while meeting the needs of our customers.

As of today, all employees have the tools necessary to perform their job functions remotely. Even if a temporary state-wide shutdown occurs, Nexus will fulfill orders.

We are coordinating with our suppliers to identify any potential supply chain problems; currently there are no disruptions or special concerns.

We want to thank you for your continued business and support as we all work together on solutions to keep our employees healthy, and our businesses, organizations, and operations running smoothly.

Best regards from everyone at Nexus.
Filed Under: Informational, Internal

Did you guess right?

February 7, 2017 By Nexus Technology, Inc.

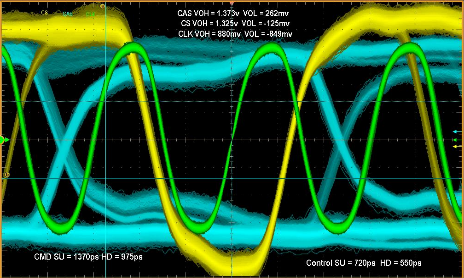
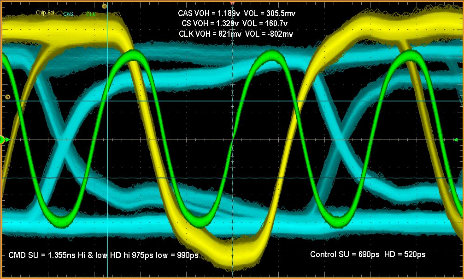
Probed Signal Left Probed Signal Right
Direct Probing on a Target Probed on a Nexus Interposer

Same signals… which one has the Nexus interposer?

Backside probing of a dimm can be difficult. Package on Package (PoP) and even memory components directly on a target can be a challenge to probe. A Nexus memory interposer solves this problem while maintaining the fidelity of the signals being analyzed. Nexus will even perform the attachment of the socket, riser or interposer as a service.

Go back to original post.

Filed Under: Internal

Content Creation

October 18, 2016 By Nexus

  • Content Creation - ...
  • Page Creation – Tables - Tables are a pain to implement well. Ask yourself if you really need a table. If the answer is yes,… ...
  • Page Creation - Main content is center and "Additional Information" content is on the right when there is enough horizontal space. Otherwise the Additional… ...
  • Media - Media is images (PNG, JPG) or datasheets (PDF). When to Add Media First ensure the media does not already exist.… ...

Filed Under: Content Creation, Internal

Page Creation – Tables

October 18, 2016 By Nexus

Tables are a pain to implement well. Ask yourself if you really need a table. If the answer is yes, then ask yourself if you really want page columns. If so, see that section. If not than ask yourself if you really need a table again. If the answer is still yes then you can do the following to create a table.

Switch from Visual to Text view to view the content markup. Navigate to the section you want to create the table.

Tables should have heading rows.

Simple Table

A simple table may look like the following:

<table>
  <tbody>
    <tr>
      <th>Column Title 1</th>
      <th>Column Title 2</th>
      <th>Column Title 3</th>
    </tr>
    <tr>
      <td>Cell 1.1</td>
      <td>Cell 1.2</td>
      <td>Cell 1.3</td>
    </tr>
    <tr>
      <td>Cell 2.1</td>
      <td>Cell 2.2</td>
      <td>Cell 2.3</td>
    </tr>
    <tr>
      <td>Cell 3.1</td>
      <td>Cell 3.2</td>
      <td>Cell 3.3</td>
    </tr>
  </tbody>
</table>
Column Title 1 Column Title 2 Column Title 3
Cell 1.1 Cell 1.2 Cell 1.3
Cell 2.1 Cell 2.2 Cell 2.3
Cell 3.1 Cell 3.2 Cell 3.3

Styling Table

You can add borders, captions,  and/or limit the width of the table. You can also shrink the content using the borders class, the caption tag, the width property, and the small-font class respectively.

<table class="border">
  <caption>Table w/Border and Caption</caption>
  <tbody>
    <tr>
      <th>Column Title 1</th>
      <th>Column Title 2</th>
      <th>Column Title 3</th>
    </tr>
    <tr>
      <td>Cell 1.1</td>
      <td>Cell 1.2</td>
      <td>Cell 1.3</td>
    </tr>
    <tr>
      <td>Cell 2.1</td>
      <td>Cell 2.2</td>
      <td>Cell 2.3</td>
    </tr>
    <tr>
      <td>Cell 3.1</td>
      <td>Cell 3.2</td>
      <td>Cell 3.3</td>
    </tr>
  </tbody>
</table>

Table w/Border and Caption
Column Title 1 Column Title 2 Column Title 3
Cell 1.1 Cell 1.2 Cell 1.3
Cell 2.1 Cell 2.2 Cell 2.3
Cell 3.1 Cell 3.2 Cell 3.3

Here is a table with borders, small text, a caption, column spans, and reduced width. Changes from previous table are in blue. Remove the strike-through lines.

<table class="border small-font" style="width: 50%;">
  <caption>Table w/Everything</caption>
  <tbody>
    <tr>
      <th>Column Title 1</th>
      <th colspan="2">Column Title 2</th>
      <th>Column Title 3</th>
    </tr>
    <tr>
      <td>Cell 1.1</td>
      <td>Cell 1.2</td>
      <td>Cell 1.3</td>
    </tr>
    <tr>
      <td colspan="3">Cell 2.1</td>
      <td>Cell 2.2</td>
      <td>Cell 2.3</td>
    </tr>
    <tr>
      <td>Cell 3.1</td>
      <td>Cell 3.2</td>
      <td>Cell 3.3</td>
    </tr>
  </tbody>
</table>
Table w/Everything
Column Title 1 Column Title 2
Cell 1.1 Cell 1.2 Cell 1.3
Cell 2.1
Cell 3.1 Cell 3.2 Cell 3.3

Filed Under: Content Creation, Internal

Page Creation

October 18, 2016 By Nexus

Main content is center and “Additional Information” content is on the right when there is enough horizontal space. Otherwise the Additional Content is below the Main Content.

While content varies from page to page, there are some guidelines for each.

Internal - Page Layout Example
Internal – Page Layout Example

Main Content Guidelines

Appropriate image should be on the top right.

Main content for product pages should start off with Key Performance Specifications, Key Features, or something similar unless it is a simple product. We’ll define a simple product a little further along.

Main content for Technology or similar pages should start off with an Overview. This section could be explicitly named or unnamed (meaning calling out section title with <h1>Overview</h1>.

“Additional Information” Content Guidelines

All sections use Heading 2 <h2</h2> tags. Do NOT use Heading 1 tags here!

For a product page, this section should start with Documentation and list, at a minimum, the product/family datasheet.

For a product page, this section should end with the appropriate development cycle image. Heading 2 title is Family. Then Add Media. You can search using keyword swoosh to find all images. You must use the 120px image here!

Content and Styles

Do everything you can to not use custom formatting beyond the following list of acceptable content

  • Headings 2, 3, and 4 <h2>, <h3>, <h4> Do NOT use Heading 1 <h1>
  • Paragraph <p>
  • Preformatted <pre>
  • Bold <strong>
  • Italics <em>
  • Strike-through <del>
  • Simple ordered lists aka numbered lists <ol>
  • Simple unordered lists aka bulleted lists <ul>
  • Blockquote <blockquote> as long as the entire paragraph(s) stand alone.
  • Links <a>
  • Dictionary Lists <dl>, <dd>, <dt> (see below)
  • Images (see below)
  • Columns (see below)
  • Tables (separate page here)
  • That’s it!

Images

Images should only be added using the ‘Add Media’ button.

Images should be moved around and positioned using the existing WYSIWYG editor that is available when you edit the Image Details. If you DO NOT want a caption, remove it here. DO NOT remove it from the Media Library! Never remove the alternate text. Use the Alignment, Size, and Link To properties.

To add an image border add img-border to the Image CSS Class textbox.

Never open a link in a new tab.

Columns

You can recommend that sections of content be displayed columns.

Switch from Visual to Text view to view the content markup. Navigate to the first section of content you want in columns.

You need to indicate where the columns begin and end and you need to indicate the data for each column. You will do this with divider tags <div> and classes.

Indicate the beginning and end of the columned content with a divider open and close tag with two class names. The first class name is stddiv-container. The second class name is stddiv-container-columns[x]. Replace [x] with 2, 3 or 4 for the number of columns requested. Then, indicate each column with divider open and close tags with a single class name of stddiv-col. Here is an example with the divider column stuff highlighted blue.

<div class="stddiv-container stddiv-container-columns2">
  <div class="stddiv-col">
    <p><strong>Here is one column of data.</strong> This is a long sentence to show it wrapping
       or not wrapping and doing something who knows what. When will it end?
       No one knows.</p>
  </div>
  <div class="stddiv-col">
    <p><strong>Here is a second column of data.</strong> This is a long sentence to show it wrapping
       or not wrapping and doing something who knows what. When will it end?
       No one knows.</p>
  </div>
</div>

And here is the code rendered.

Here is one column of data. This is a long sentence to show it wrapping
or not wrapping and doing something who knows what. When will it end?
No one knows.

Here is a second column of data. This is a long sentence to show it wrapping
or not wrapping and doing something who knows what. When will it end?
No one knows.

Dictionary Lists

Dictionary lists may be used and are especially useful for tabular type data. These are great for data that you may be tempted to create tables for. Usually these lists are better than tables. The are good for product nomenclatures. See the MA5100 Series Memory Analyzer (bottom of page) for an example of how to use dictionary lists to build a list nomenclatures.

Unfortunately this is not available in the Visual editor. You can add these to your page using the Text view. An example coding is:

<dl>
 <dt>Term A</dt>
 <dd>Term A definition line 1.</dd>
 <dd>Term A definition line 2.</dd>
 <dd>etc.</dd>
 <dt>Term B</dt>
 <dd>Term B definition line 1.</dd>
 <dd>Term B definition line 2.</dd>
 <dd>etc.</dd>
</dl>

And here is the code rendered.

Term A
Term A definition line 1.
Term A definition line 2.
etc.
Term B
Term B definition line 1.
Term B definition line 2.
etc.

Filed Under: Content Creation, Internal

Media

October 18, 2016 By Nexus

Media is images (PNG, JPG) or datasheets (PDF).

When to Add Media

First ensure the media does not already exist. Do NOT add image media that differs only in size, cropping, etc.

Adding Media

  1. Does similar or same image already exist? If so, DO NOT ADD IT!
  2. Never add a border to the image itself. Tell the page to add a border around the image!
  3. Normal resolution images should not exceed around 800 x 800 and 72 DPI. Normal resolution images are usually all that are needed when placing on pages of the site.
  4. High resolution images should not be over 1024 x 800 and 72 DPI.
  5. High resolution images are NOT normally needed.
  6. Collect meta data.
    1. Image must belong to some keyword. For example, a product image would be the same or very similar as the product page title or product.
      1. lpddr4_edgeprobe_272 w/caption of LPDDR4 EdgeProbe(TM) Direct Attach. Note all the keywords.
      2. lpddr4-272-ball-edgeprobe-interposer-datasheet LPDDR4 272 Ball EdgeProbe(TM) Interposer Datasheet
      3. ma4100_waveform_display w/caption of MA4100 State Waveform Window Example
      4. Note how searches for LPDDR4, MA4100, Waveform, or EdgeProbe would find the media.
  7. Save image locally with new name
  8. Upload image.
  9. Set image metadata.

Filed Under: Content Creation, Internal

Primary Sidebar

Copyright © 2025 Nexus Technology, Inc. You are on the **TEST SITE** nexustesttechnology.com